
I was a farm-to-table restaurant chef for four years. Our menu featured pizza and several types of pasta here, but our fresh, made-from-scratch pasta was the star. It cooks quickly and has a light, springy texture. No more 12-minute boiling times with dried pasta. But when I left the restaurant, I missed it terribly.
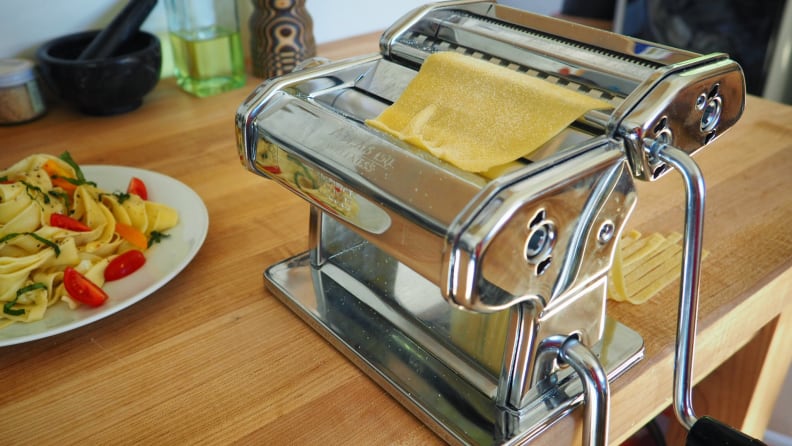
You can make restaurant-style pasta at home easily. No need for pricey, high-tech Italian pasta extruders. A hand-crank machine will do. With a little practice, you can make spaghetti, fettuccine, ravioli, and lasagna noodles. You may not be able to make every unique shape, but it’s still impressive. Your dinner guests will surely be impressed. Try it out for a few minutes for yourself and see.
How to choose a pasta maker
Upgrade your pasta-making game with the Marcato Atlas’ electric pasta attachment machine. After testing various manual pasta machines first, the Atlas stood out as the clear winner, producing restaurant-quality noodles. Say goodbye to mediocre pasta machines and hello to culinary excellence with this Italian-made masterpiece.
You don’t need an electric pasta maker to make homemade pasta. Rolling the dough with a pin and cutting it with a knife is possible, but not easy. Get a manual pasta- maker to save time and effort. It’s worth the investment. There are affordable options available. Enjoy making pasta!
The Marcato Atlas Pasta Machine is perfect for homemade pasta on a budget. Its hand-crank function lets you make noodles easily. It’s compact and clamps onto your countertop for convenience. Making pasta from scratch with loved ones is a priceless experience. Roll up your sleeves and this electric pasta machine to make some delicious pasta!
The KitchenAid pasta roller attachment is a luxurious tool for making delectable pasta dishes quickly and easily. With a full electric design, it allows you to feed the dough through the roller with ease, giving you free hands. It’s perfect for those who want restaurant-quality pasta without the hassle. However, you’ll need a KitchenAid stand mixer to use it, so be prepared to splurge a little if you want to indulge in this pasta-making luxury.
Our go-to pasta recipe
This all-purpose dough recipe will elevate your pasta game. It stands out as a favorite among many other pasta dough recipes. Make pasta with the perfect texture and flavor for any dish you want to create. Your own taste test buds will be impressed.
Making pasta can be overwhelming with so many recipes and machines to choose from. But don’t worry, our advice is to find a recipe and practice it. Pasta dough is forgiving, so don’t give up if it doesn’t work out at first. We have a reliable recipe for you to try. Get ready to make your perfect dish with our go-to pasta recipe.
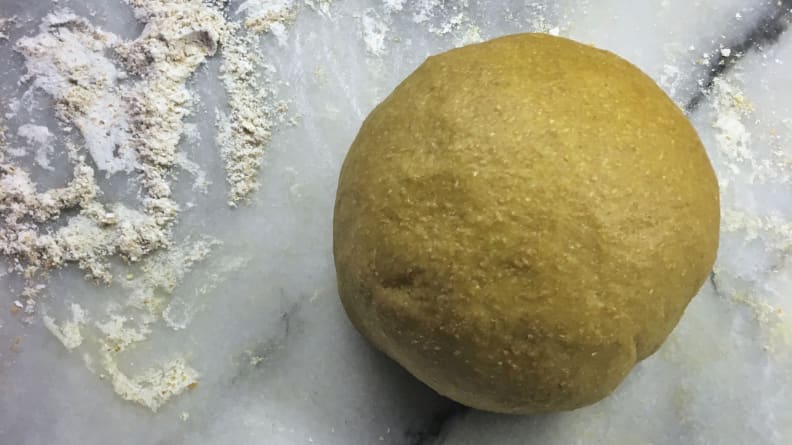
- Make fresh homemade pasta by combining all-purpose flour and salt in a bowl. Add eggs, olive oil, and water to the mixture. Mix everything by hand or with a KitchenAid stand mixer. Knead the dough for 10 minutes. The end result will be delicious homemade pasta everyone will enjoy.
- Make your dough mixing routine exciting! Attach a dough hook to your stand mixer and watch as the ingredients form a perfect ball. If it’s not quite there, add water until it comes together. If it’s sticking, add flour. Let the mixer knead the dough until it’s smooth. But don’t rush – the dough needs to rest. Wrap it up tightly and let it chill for at least 30 minutes.
- Let your dough rest to build a gluten network for springy noodles. Skipping this step leads to disaster with a stubborn, unmanageable mess. It also risks ruining the balance of gluten bonds and losing that perfect pasta chew. Give your dough the time it deserves and show it some love.
Make homemade pasta dough with ease by prepping it ahead of time and storing it in the fridge for up to two days. Fresh pasta can be frozen in a can for up to three weeks, just thaw it in the fridge beforehand. To ensure perfectly cooked pasta, let the dough come to room temperature for an hour before using it. This simple hack makes making homemade pasta a breeze!
How to use a pasta maker
You can become a pasta pro by following four easy steps. First, divide the dough. Next, laminate it. Then, roll it out. Finally, cut it into shape. Use a pasta maker to have pasta makers help you. Follow these steps and you’ll be making delicious homemade pasta in no time.
1. Divide the dough
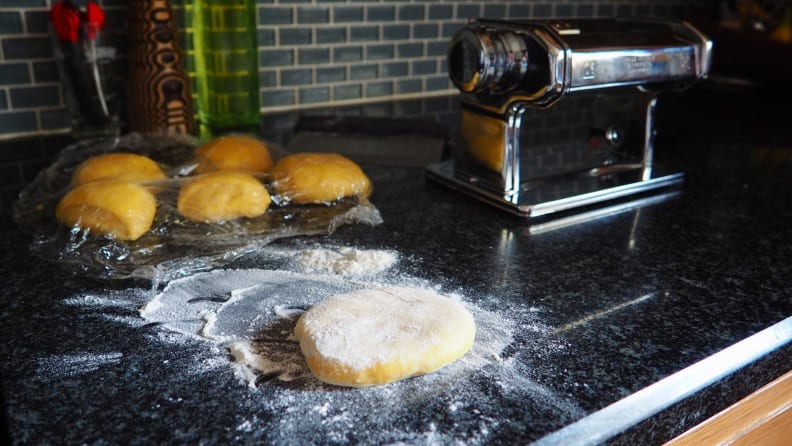
To succeed in the kitchen, divide pasta dough into smaller portions. Don’t try to handle a three foot long pasta sheet alone. Make things simpler without sacrificing taste or quality by taking control of your culinary creations.
To make rolling out dough easier, use a bench scraper to divide it into smaller pieces. This will prevent struggling with one big ball. Keep all the dough and balls fresh by wrapping them tightly in plastic wrap.
Making perfect pasta requires skill and precision. Flattening each dough ball is crucial. Dust with flour generously to prevent mishaps. Use a rolling pin or your palm. With steady hands and a keen eye, start your pasta-making journey and laminate like a pro.
2. Laminate

To make your pasta stand out, try laminating the dough. Laminating isn’t only for croissants and pastries. It involves alternating layers of dough and butter for flaky layers. This strengthens the gluten network and creates a chewy texture. Plus, you can roll out super-thin sheets. Your taste buds will appreciate your improved pasta-making skills.
Start with a dough ball. Flatten it and run it through a machine a few times. Fold and repeat until smooth. Adjust the knob to customize thickness. Roll to desired thickness. Now the dough is ready for culinary possibilities.
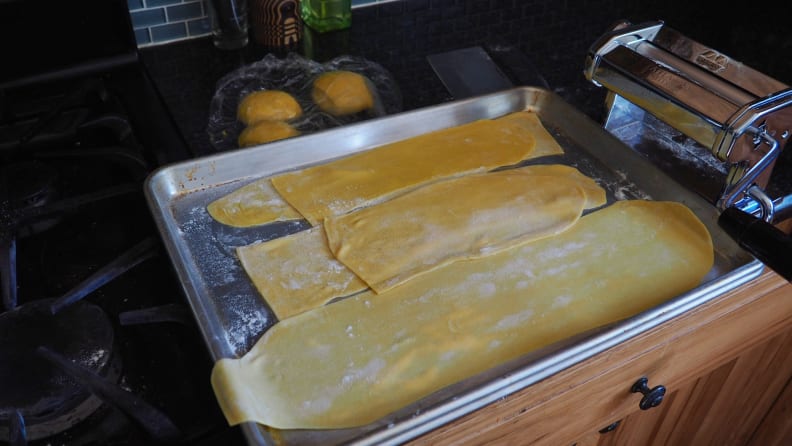
3. Roll it thinner and thinner
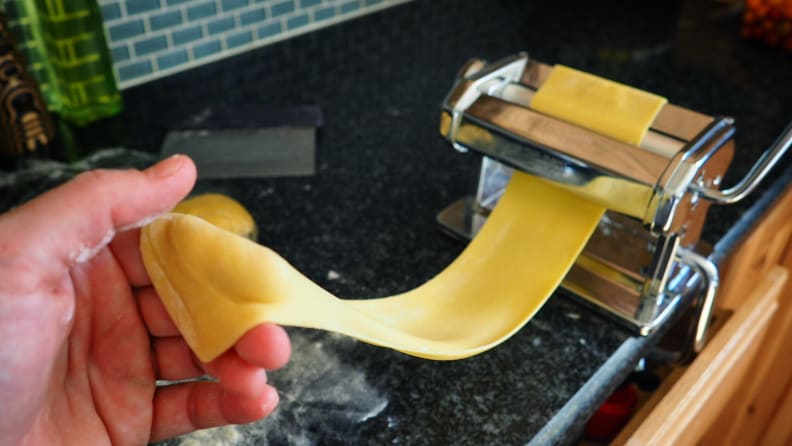
Prepare for a hands-on pasta making experience. Roll your dough through the pasta machine and grab the sheet as it emerges. Use plenty of flour to avoid stickiness and watch the dough glide through the pasta machine effortlessly.
Bakers, get ready to roll out delicious dough. Laminate it with parchment paper and roll it through the machine until it’s the perfect thinness. Run it through the rollers twice for TLC and to avoid tears or jagged edges. If it gets too long, slice it in half and keep going. Your perfect pastry dreams await!
Homemade pasta is an art form that requires precision and patience. To keep the dough delicate and thin, handle it gently. If it sticks, dust it with flour or use remedies to fix it. For regular pasta, the second-to-last or “5” thickness setting on the Marcato Atlas is best. Thinner sheets work well for filled pasta like ravioli. Enjoy the entire process of creating culinary excellence.
Rolling out pasta dough requires patience and attention to detail. Each sheet is rolled out meticulously in anticipation of delicious meals. The possibilities are endless once all the pasta sheets are ready. They can be cut into any shape or used as a sturdy base for Italian dishes. If the dough sticks together, simply dust it with flour and store it until ready to use. With creativity and skill, homemade pasta is a true masterpiece.
When making pasta, mistakes can happen. But there’s a secret trick to save your dough. If it tears or sticks together, fold it in half and feed it back through the machine. This works like magic! Just remember to start over at the widest setting to avoid the same problem. Don’t let a pasta disaster ruin your day – happy pasta-making!
4. Cut your shapes
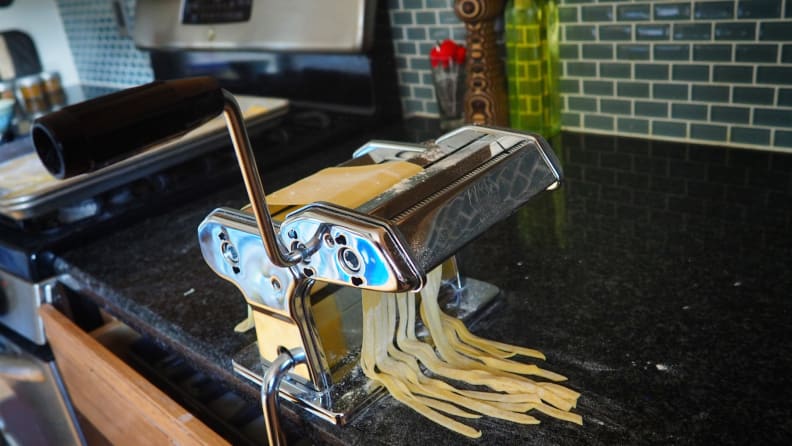
To make delicious homemade pasta, dust the sheets with plenty of flour before running them through the manual pasta maker attachment. This will create thin sheets of pasta with beautiful perforations that home cooks are sure to impress.
Making pasta with a cutting attachment is easy. Attach the tool and adjust the handle. You can customize the length of your noodles by cutting the sheets in half. Let your creativity flow and make them as long or short as you’d like. Soon, you’ll have homemade noodles that will impress anyone.
Make your pasta party a success by following these simple tips. Before sending your pasta sheets through the electric top, dust them with flour to prevent noodle catastrophes. Keep cranking to catch the freshly-cut noodles as they fall. Lay the noodles on a a baking sheet or tray and admire your handiwork. For easy storage, create aesthetically pleasing noodle balls. With these tips, you can let your inner pasta chef shine.
Making handmade noodles can take some practice, but don’t fret if they aren’t perfect at first. Pasta is forgiving, so if they don’t perforate or stick together, try rolling out a new sheet. When you’re ready to cut them, add a dusting of flour for a flawless finish. With a little patience, your homemade pasta will be both delicious and beautiful.
5. Cook (and enjoy)
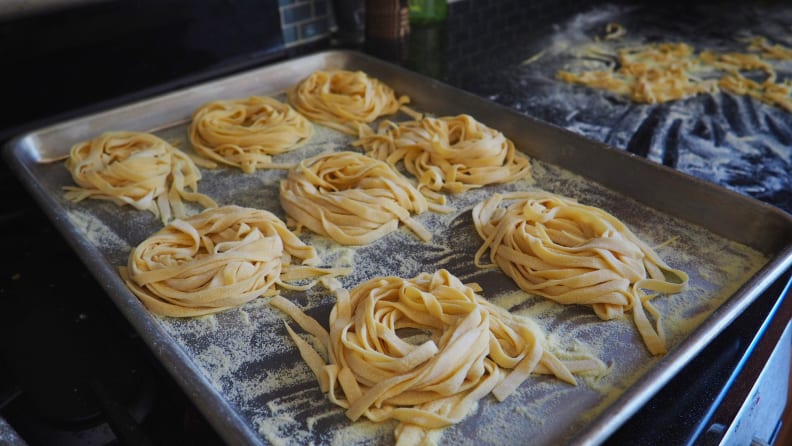
These pasta nests are cute and ready to be cooked. Fresh pasta cooks quickly, with thin noodles taking one minute and thicker ones taking two. Have your sauce ready before cooking. Cook in salty water for a few hours for perfectly seasoned pasta. Don’t rinse or oil them to help them cling to your sauce. Enjoy a delicious pasta meal.
Cooking pasta perfectly is an art form. Appearance is key – look for a lighter color, expanded shape, and buoyancy. Fresh pasta won’t have the same al dente texture as dried pasta. Enjoy the softness and deliciousness without trying to achieve a toothsome bite.
Making fresh, homemade pasta is easy with just four steps. Enjoy the authentic taste of your very own pasta creations and you may never buy store-bought pasta again. Get ready for a fun pasta-making adventure!
How does a pasta making machine work?
The electric roller rolls the dough to a sheet pan a desired size automatically. The user can then cut the sheets to their desired length. The dough is mixed using a machine that extrudes the dough sticks and ingredients. The dough is pressed through an extrude plate to create it using a pasta or plate.
Do you flour in a pasta maker?
To feed dough to large bowl of your machine, flour it every time. Flotation of AP flour improves handling and reduces stickiness. Don’t be afraid to cover your fingers with flour to grab the dough without getting stuck.